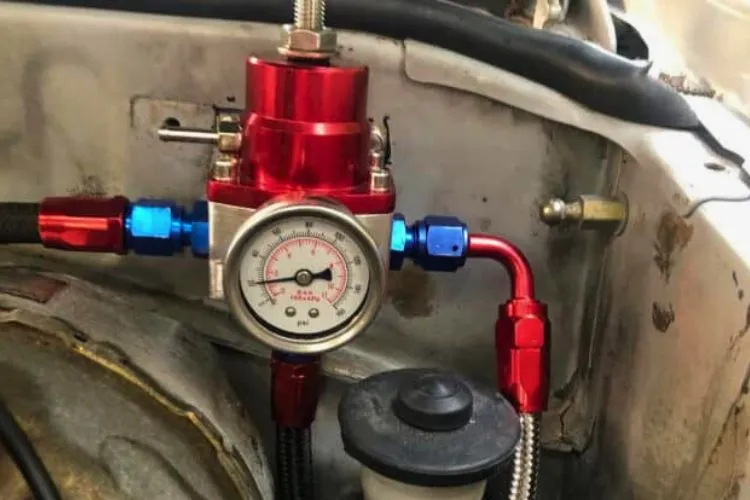
As the unsung hero of your vehicle’s fuel system, the fuel pressure regulator is vital in maintaining optimal engine performance. But dirt and contaminants can take their toll over time, leading to inefficiency and potential damage.
That’s why it’s important to know how to clean fuel pressure regulator on your own to stay ahead in the game.
In this step-by-step guide, I’ll demystify cleaning your fuel pressure regulator, ensuring you get the most out of your engine while preventing costly repairs.
Say goodbye to sputtering starts and poor acceleration, and get ready to hit the road with newfound confidence.
Contents
How to clean fuel pressure regulator (A Step-by-Step Guide)
Detach the Power System
- Disconnect the negative cable from the battery.
- Remove the air intake assembly.
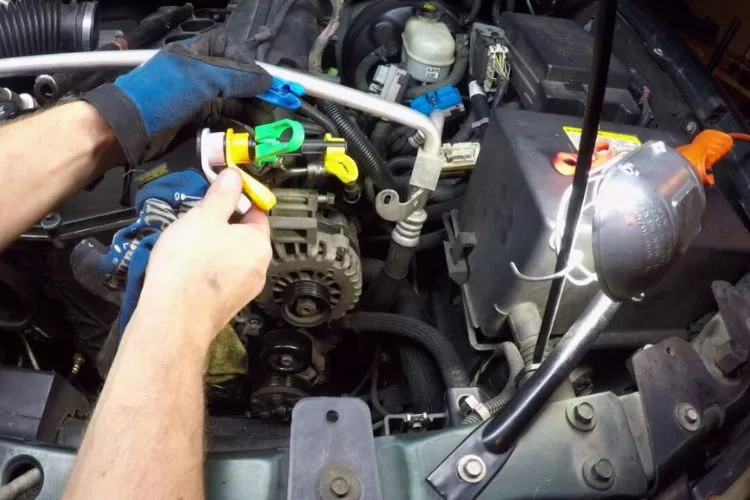
- Disconnect the fuel line from the fuel rail.
Detach the Gas Cap
Remove the gas cap from the fuel tank. Inspect the cap for any signs of damage, then make sure it is securely fastened to your fuel tank.
Release Extra Pressure from the Fuel Injector
To release the pressure from the fuel injector:
- Start your engine and allow it to run until you hear a hissing sound from the line.
- Turn off the engine and disconnect the fuel injector line.
- Do not tighten down on it too much when you reconnect it, as this could damage your regulator.
Detach Vacuum Hose from Fuel Lines
- Locate the vacuum hose. It’s usually a small, clear plastic tube that connects to the fuel pressure regulator and runs up to the engine bay.
- Disconnect the vacuum hose from its connection points on both sides of the fuel pressure regulator (one end goes into an opening on top of your engine, while another end connects to another part).
- Inspect both ends of this piece for signs of damage or wear; if either looks damaged or worn out, replace it with new hardware before proceeding further with cleaning your regulator.
Detach the Retaining Bracket of the Regulator
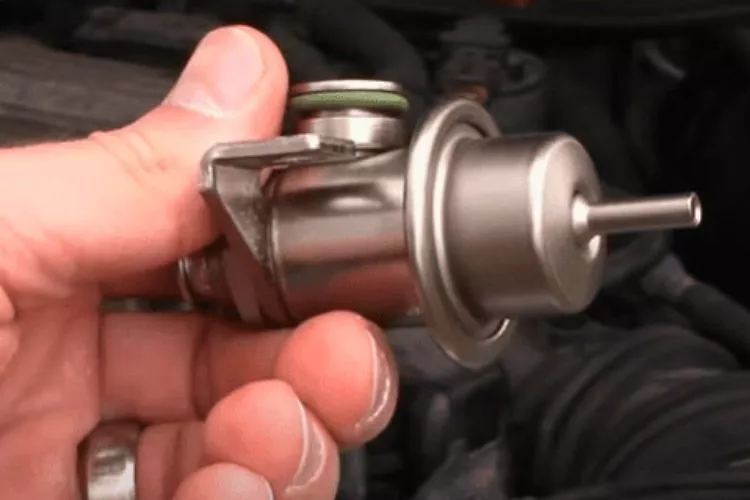
To detach the retaining bracket of the regulator, you need to locate it first. It will be located on top of your fuel tank and secured by two bolts that go through it.
You should remove these bolts using an Allen wrench or socket set to loosen them off easily. Then disconnect any wires from your regulator if they’re still attached to it and pull off any rubber hoses connected to your unit.
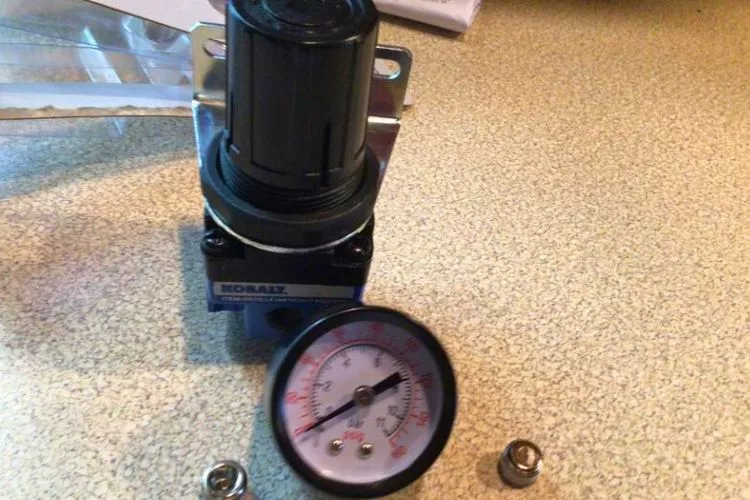
Once you’ve disconnected everything from under your hood, take off all remaining pieces, such as vacuum lines (if applicable), brackets or clamps holding down electrical connections like wires going into sensors or switches etc., etc., until nothing remains except for bare metal parts underneath where there used to be something else before now!
Dispose of the O Ring if Dirty
If the O ring looks dirty or damaged, replace it. To do this, remove the old O ring from its groove and discard it. Then place a new one in its place. You’ll have to use some force to get it into place–but don’t worry about damaging anything!
You must inspect your fuel pressure regulator regularly to catch any problems early on before they become major ones.
Clean All the Parts
Clean the regulator and O ring with a soft cloth. Wipe away any dirt or debris, and make sure all parts are completely dry.
Assemble Everything Back
Once you’ve cleaned and inspected your regulator, it’s time to put it back together.
- Reattach the regulator to the fuel lines.
- If necessary, secure the retaining bracket to the fuel lines using new hose clamps (if necessary).
- Connect a vacuum hose from your intake manifold vacuum port to one of your new vacuum nipples on your regulator assembly (this will help pull air out of your system).
Reconnect the Fuel Line to the Fuel Rail
Reconnect the fuel line to the fuel rail.
Ensure the connection is secure, then tighten it with an adjustable wrench or pliers.
Reattach the Air Intake Assembly and Battery Cable
Once you have cleaned and inspected the fuel pressure regulator, it’s time to reattach it. First, reconnect the negative cable to your battery. Then attach the air intake assembly back onto your engine using new clamps or bolts if necessary.
Finally, start up your vehicle and check for leaks at all points where there was previously an issue with leaking fuel or oil (for example: around where you removed connectors).
When to Seek Professional Help
While it’s certainly possible to clean your fuel pressure regulator yourself, there are instances when seeking professional help is the wiser choice.
If you’re inexperienced with automotive repairs, consulting an expert is best to ensure the task is carried out correctly and safely.
Additionally, if you notice persistent issues such as poor acceleration, decreased fuel efficiency, or engine stalling even after cleaning the regulator, a mechanic can diagnose any underlying problems requiring more extensive repairs.

Moreover, vehicles with advanced fuel systems or hard-to-reach fuel pressure regulators may require specialized tools and expertise that only a professional can provide.
Lastly, if you’ve attempted to clean the regulator but continue to experience fuel leaks or abnormal pressure readings, don’t hesitate to seek the help of a trained technician. A professional assessment and intervention can save you time, money, and potential damage to your vehicle’s fuel system.
Can You Clean a Fuel Pressure Regulator?
The answer is yes, with caution. The fuel pressure regulator is vital in maintaining the correct fuel pressure in your vehicle’s fuel system.
Over time, it can accumulate dirt and debris, affecting its performance. To clean it, carefully remove the regulator from the fuel rail and use a pressurized cleaner designed for fuel system components.
Avoid using abrasive materials or chemicals that could damage the delicate diaphragm or internal components. Once cleaned, reinstall the regulator and test for proper operation.
Regular maintenance can extend the life of the fuel pressure regulator and ensure optimal vehicle performance.
How do I know if my fuel pressure regulator is clogged?
A fuel pressure regulator is a critical component of your vehicle’s fuel system, ensuring that the correct pressure is maintained to deliver fuel to the engine.
When this component malfunctions, it can lead to a range of issues that negatively impact your vehicle’s overall performance and efficiency. Here are seven telltale symptoms of a bad fuel pressure regulator to watch out for:
- Poor Engine Performance: A failing fuel pressure regulator can cause your engine to perform poorly due to an imbalance in the fuel-to-air ratio. This may result in rough idling, stalling, or hesitation when accelerating. In some cases, it can also lead to reduced fuel efficiency and decreased overall power.
- Engine Backfiring: If the fuel pressure regulator is not working correctly, it can cause an overabundance of fuel to enter the engine. This excess fuel may not burn properly and can lead to backfiring, characterized by loud popping noises from the exhaust.
- Black Exhaust From Tailpipe: A faulty fuel pressure regulator can cause a rich fuel mixture to form, meaning that there is too much fuel and insufficient air. This can lead to incomplete combustion and black smoke from the tailpipe, indicating that unburned fuel is being expelled.
- Check Engine Light Will Be On In many cases, a problem with the fuel pressure regulator will trigger your vehicle’s check engine light. This is because modern vehicles are equipped with sensors that monitor the fuel system’s performance, and any deviation from the expected performance can cause the light to illuminate.
- Fuel in Vacuum Hose: If you notice fuel in the vacuum hose connected to the fuel pressure regulator, this clearly indicates that the diaphragm inside the regulator is damaged, allowing fuel to seep through. This issue can lead to various performance problems and should be addressed as soon as possible.
- Leaking Fuel: A damaged or worn-out fuel pressure regulator can cause fuel leaks, which can be dangerous and lead to a fire hazard. Be sure to inspect the area around the regulator for any signs of fuel leakage, and if you suspect a problem, have it checked by a professional mechanic.
- Black Spark Plugs: When a fuel pressure regulator is not functioning correctly, it can cause a rich fuel mixture that forms carbon deposits on the spark plugs. Over time, this buildup can make the plugs appear black and cause misfires and other engine performance issues.
In conclusion, a bad fuel pressure regulator can cause various issues that impact your vehicle’s engine performance, efficiency, and safety. If you suspect that your fuel pressure regulator is malfunctioning, it must be inspected and repaired by a professional mechanic as soon as possible.
How do you test a fuel pressure regulator at home?
Testing a fuel pressure regulator at home can be a simple and cost-effective way to determine if it’s malfunctioning before taking your vehicle to a professional mechanic.
Here’s a step-by-step guide on how to test a fuel pressure regulator at home:
- Gather necessary tools: To test the fuel pressure regulator, you’ll need a fuel pressure gauge, a vacuum pump, and some basic hands tools like wrenches and pliers.
- Locate the fuel pressure regulator: Consult your vehicle’s service manual to find the location of the fuel pressure regulator, typically found on the fuel rail near the engine.
- Attach the fuel pressure gauge: Safely relieve fuel pressure from the system by following your vehicle’s service manual instructions. Then, connect the fuel pressure gauge to the test port on the fuel rail, usually covered by a cap. Make sure the connections are tight and secure.
- Start the engine: Turn on the engine and let it idle. Observe the fuel pressure gauge reading. Compare this reading with the recommended fuel pressure range specified in your vehicle’s service manual.
- Test the vacuum line: With the engine still running, locate the vacuum hose attached to the fuel pressure regulator. Carefully remove the hose and attach the vacuum pump to the regulator. Apply a vacuum using the pump, and observe whether the fuel pressure decreases. This indicates that the regulator is responding to changes in the vacuum.
- Inspect the vacuum hose: While the hose is disconnected from the regulator, check for the presence of fuel inside. If you find fuel in the hose, it’s a sign that the fuel pressure regulator’s diaphragm is damaged and requires replacement.
- Evaluate the results: If the fuel pressure is within the recommended range and the regulator responds to vacuum changes, the fuel pressure regulator is functioning correctly. However, if the pressure is out of range or the regulator doesn’t respond to vacuum changes, it’s likely faulty and needs replacement.
Remember, working with fuel systems can be dangerous if not done correctly. If you’re not confident in performing these tests or unsure about the results, it’s advisable to consult a professional mechanic.
What Are the Risks and Warnings Associated With Cleaning a Fuel Pressure Regulator?
Cleaning a fuel pressure regulator is essential for any vehicle, as it helps maintain optimal fuel flow and engine performance. However, certain risks and warnings are associated with this process that every individual should be aware of before attempting it.
Firstly, flammable fuel and its vapors pose a significant fire hazard. To minimise this risk, it is crucial to work in a well-ventilated area, away from open flames and sparks. Wearing protective gear, such as gloves and safety goggles, is highly recommended to prevent skin irritation and protect your eyes from fuel splashes.
Secondly, fuel pressure regulators operate under high pressure, and improper handling can lead to sudden pressure release, causing injury. Before cleaning the regulator, ensure the pressure is safely released by following the manufacturer’s guidelines. Exercise caution while handling the regulator and its components, as they may be sharp or fragile.
Thirdly, incorrect tools or cleaning solutions can damage the fuel pressure regulator or its components, leading to poor functionality or failure. Always use the recommended cleaning products and methods to avoid causing harm to the regulator.
Lastly, if you are inexperienced or unsure about the cleaning process, it is advisable to seek professional assistance. An expert technician is better equipped to handle the risks and warnings associated with cleaning a fuel pressure regulator, ensuring the individual’s safety and the vehicle’s proper functioning.
Frequently Asked Questions (FAQs)
Can a fuel pressure regulator get clogged?
Answer: Yes, a fuel pressure regulator can get clogged due to contaminants in the fuel or corrosion, affecting its performance and potentially causing issues with fuel delivery.
Can you reuse a fuel pressure regulator?
Answer: While it is possible to reuse a fuel pressure regulator after cleaning, replacing it if it shows signs of damage or wear is advisable.
What does a bad fuel regulator look like?
Answer: A bad fuel regulator may exhibit symptoms such as poor engine performance, inconsistent fuel pressure, black smoke from the exhaust, or fuel leaks.
How long does it take to fix a fuel pressure regulator?
Answer: The time to fix a fuel pressure regulator varies, but it typically takes 1-2 hours, depending on the vehicle make and model and the technician’s experience.
Conclusion:
In conclusion, a clean and well-maintained fuel pressure regulator is essential for optimal engine performance and efficiency. By following the simple steps outlined in this article, you can easily clean your fuel pressure regulator at home, saving time and money.
Regular maintenance ensures your vehicle’s longevity and reduces harmful emissions, contributing to a greener environment.
So, take the initiative today and give your fuel pressure regulator the care it deserves, and watch your engine thank you with improved performance.

